
Surprises during lockdown come with fresh ideas…This is an understatement when it comes to this colourful beauty.
Oh well, we all know what a Pavlova is and how it looks like and a plethora of variations and recipes exists out there… This is our take on this Russian beauty.
INGREDIENTS (A)
-4 Large Eggs (only the whites)
-220g Caster Sugar
-Madagascan Vanilla extra (1 tsp)
-Corn Flour (1 tbsp)
-White Vinegar (1tbsp)
You will need these ingredients to prepare the meringue, which is the base!
THE ART OF THE MERINGUE
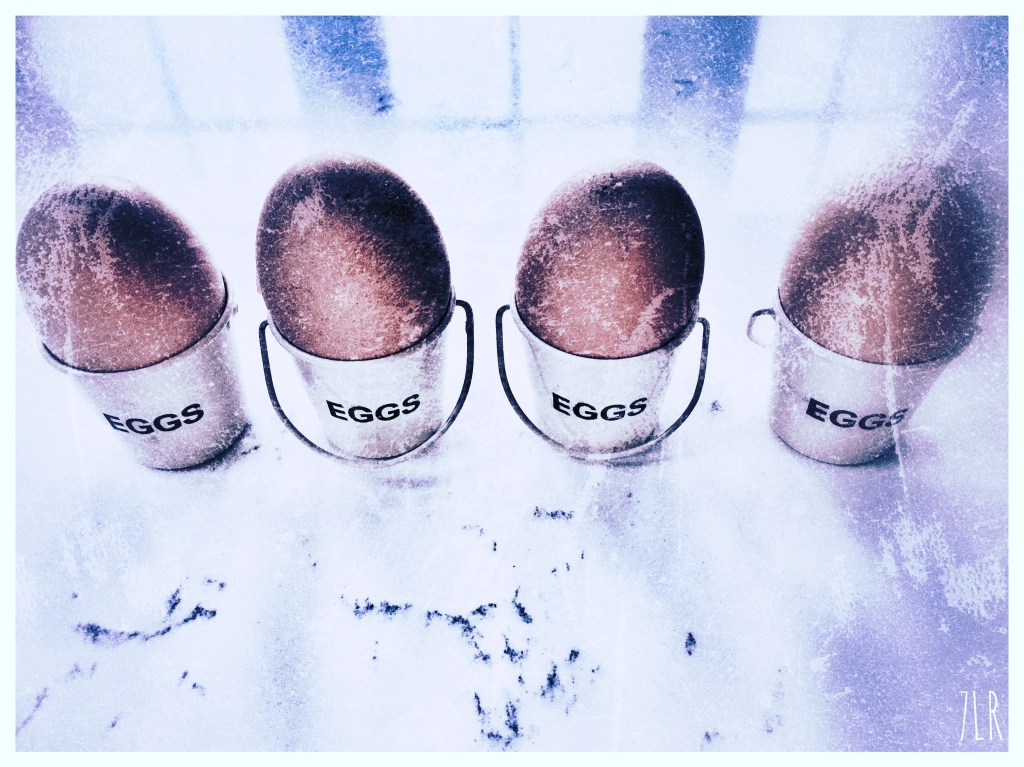
-Separate the egg whites, then add them in a large bowl
-Start whisking the whites (preferably with an electric hand whisk tool)- BEAT the Eggs Steadily and Strongly
-Perform this sensitive art of whisking until you see the whites turning fluffier- like a cloud
-As soon as you start feeling the transformation-leaving aside your enormous smile- start adding the sugar. This should be done slowly and gently, and keep whisking in between –DO NOT STOP
-Separately, combine the cornflour with the white vinegar (alternatively you can use some lemon instead of vinegar) and then add this to the mixture- Keep Whisking
-Lastly, add the vanilla extract to the mixture and keep whisking until you feel the stiffness- you need to reach this stiff peak stage
Well done, now you have your fluffy white mixture ready!
First step has been completed.
Now next, you need to fetch a baking tray, add a baking paper sheet on top and draw a circle in the middle with a pencil –Use a plate (21-23cm) or your arty skills to trace it
Start pouring the meringue slowly into the drawn circle with a large spoon. You just need to feel that you are building it, like a form of blocks of fluffiness stacked in an arty way at the edges and within the circle. Rise the borders higher than the centre. (I am sure you all have seen how a Pavlova looks like!)
Try to build your own version and use a spatula as a tool to guide you if need be. The centre needs to be formed lower than the edges, since this is where your filling will find its natural home later on.
In the meantime, preheat the oven and as soon as you have finished with the steps, as above, bake the meringue for approximately an hour (approx. 140C or even lower temperature). It should stay white or turn into a fading beige colour. Take care not to burn it (no brown colour please). It should be crunchy outside and feel like a marshmallow inside.
If you are able easily to slightly peel off/remove the baking paper sheet from below, (without burning yourself of course), it is likely to be ready.
After the base has been baked, leave it to cool-preferably inside the oven- for about an hour. You may keep the oven door shut, but open it towards the end.
TOPPING
Whilst the meringue is in the making, prepare your filling, which is the next step. You will need two different sets of ingredients:
INGREDIENTS
A) For the bubble-pinky coloured sauce
-A handful of fresh fruits (around 100g in total of fresh strawberries, blueberries and raspberries)
-1tbsp of icing sugar and
– some whipping cream (less than 100ml)
B) For the white coloured, creamy filling (and decoration)
-At least 500-600g of fresh fruits (a combination of strawberries, blueberries, raspberries)
-whipping cream (350-400ml)
-icing sugar (1-2tbsp)
-vanilla extract (1tsp)
-We also added some spicy rum, but any other alcohol such as cognac would be sufficient- You just need a splash of it, 1tsp will be more than enough.

WHIPPING CREAM v WHIPPED CREAM
-First, blend the ingredients for the pinky sauce in a blender until you get a smooth texture. Add more whipping cream in the blender if you think it requires it.
-Second, separately, whisk the whipping cream used for the white filling, until it becomes whipped. It has to stand in peaks. Whilst whisking it, add slowly into this mixture the rest of the ingredients (mainly the icing sugar and the splash of alcohol and vanilla extract)- All except from the fruits.
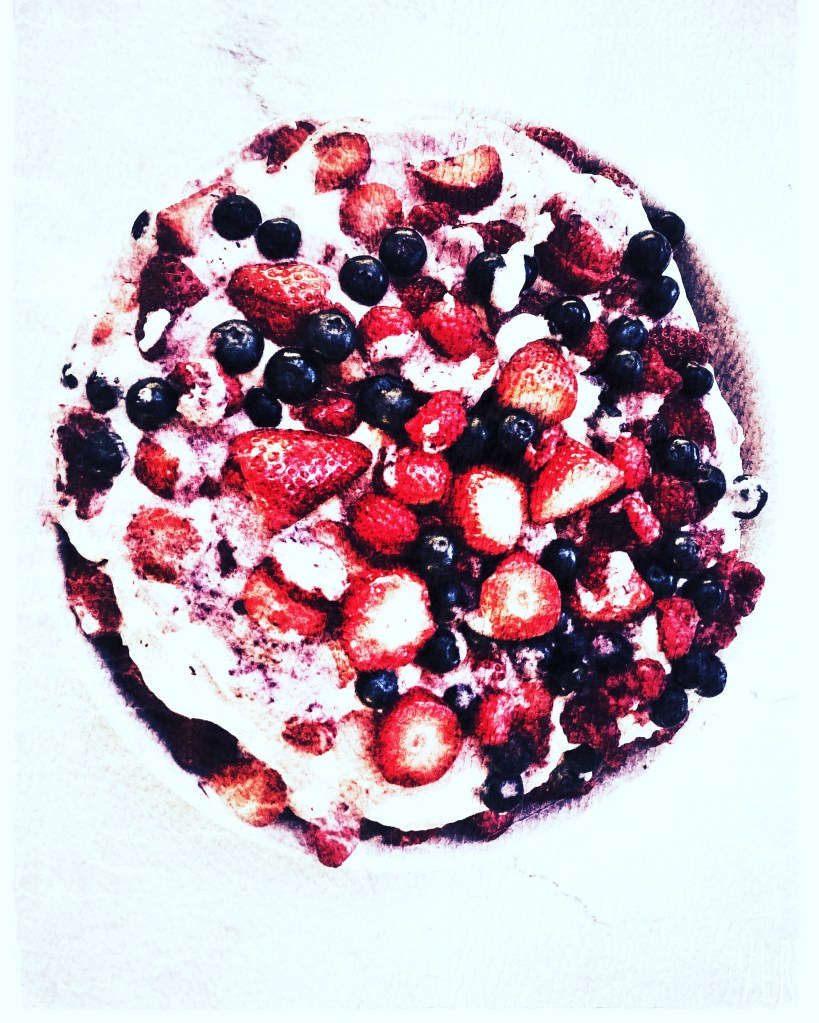
THE ART OF DECORATING
Last few steps-Finally!
Now you have a base and two variations of whipped creams.
Start filling the meringue base with the white filling/whipped cream first. Then pour over some of the pinky sauce.
Save some pinky sauce to pour over at the very end, on top of the piles of fruit.
Lastly add and decorate with the fresh colourful fruits.
Your Pavlova will now spend an hour or two in the fridge before serving.
Hope you enjoy it!
7LR


Yum looks lovely!! Lucky kid!
LikeLike